The difference between a perfect medium-rare steak and an overcooked one is 5°F of internal temperature and 90 seconds on the pan. The difference between a beautiful crust and a steamed-grey exterior is 50°F of pan temperature at the moment the steak hits the surface. Cooking steak isn’t intuitive — it’s measurable.
After 22 years of cooking steak in restaurants and five years comparing the same cut on every cooktop technology in our test kitchen, here is the complete chart — internal temperatures, sear times by thickness, and the exact pan and power settings that produce restaurant-quality results at home.
For the full searing technique on induction, see our how to sear steak on induction guide. For deep-frying on the same hardware, our how to deep fry on induction covers a related high-heat technique.
The internal temperature chart
The single most important chart in steak cooking. Pull the steak from the pan when it reaches the pull temperature — carryover cooking during rest brings it to the final temperature.
| Doneness | Pull temp | Final temp | Color and texture |
|---|---|---|---|
| Blue rare | 110°F | 115°F | Cool red center; firm exterior; raw-feeling middle |
| Rare | 120°F | 125°F | Cool red center; soft and yielding |
| Medium-rare | 128°F | 133°F | Warm red center; soft with slight resistance — the sweet spot |
| Medium | 135°F | 140°F | Warm pink center; firmer; classic restaurant medium |
| Medium-well | 145°F | 150°F | Slight pink trace; firm; less juicy |
| Well-done | 155°F | 160°F+ | No pink; firm to hard; significantly drier |
USDA food-safety minimum: 145°F internal with 3-minute rest for whole-muscle beef. Below 145°F is a personal preference choice — most steakhouses serve medium-rare at 133°F final, which is below USDA recommendations but consistent with how steak has been cooked for centuries in professional kitchens.
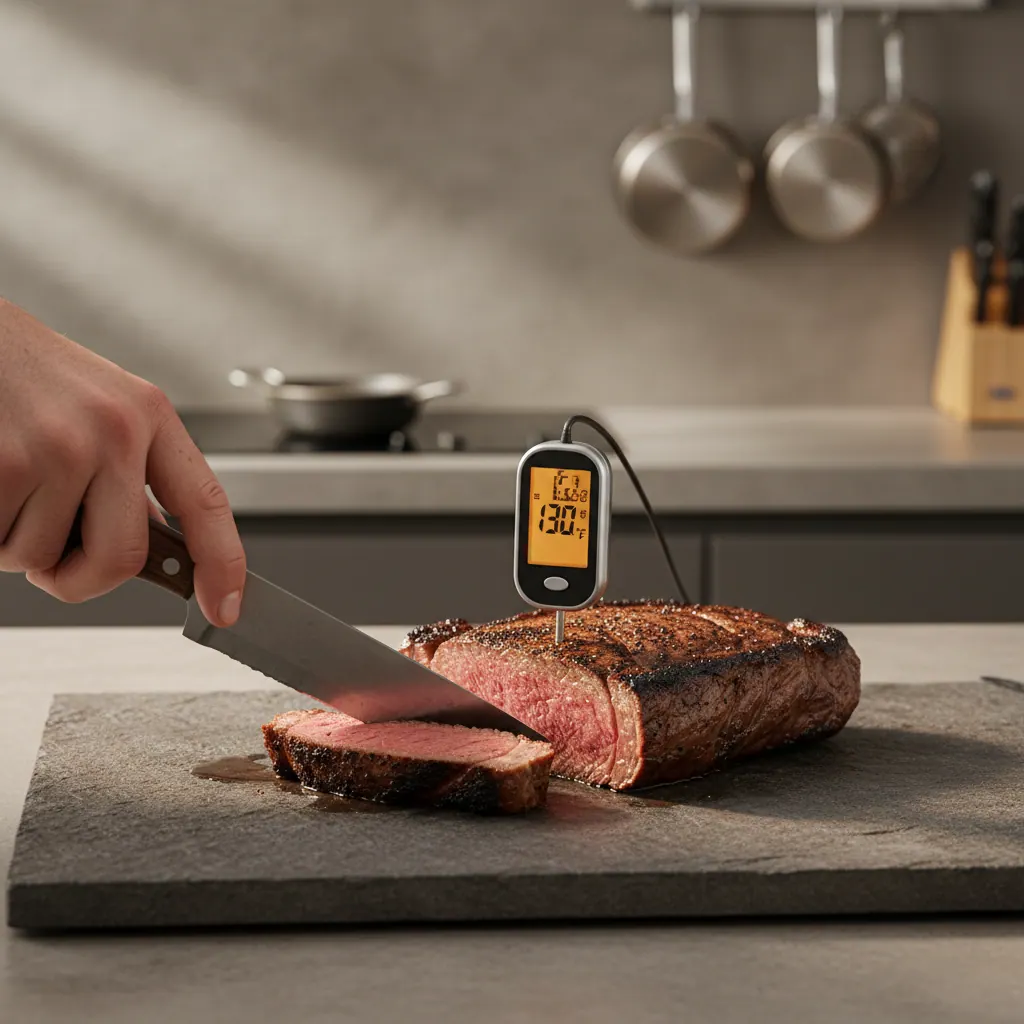
Always measure with an instant-read thermometer — visual judgment by experienced cooks varies ±10°F, which is the difference between rare and medium. A ThermoWorks ThermaPen or similar reads in 2–3 seconds. Insert horizontally into the thickest part of the steak, avoiding bone.
Cook time by thickness
The chart below assumes a properly preheated cast iron pan (450–500°F surface temperature), refrigerator-cold steak removed 30 minutes before cooking, salted at least 40 minutes ahead, patted dry with paper towels.
Induction cooktop (3,700W zone, level 9 sear)
| Thickness | Sear per side, medium-rare | Total cook time | Rest time |
|---|---|---|---|
| 0.75-inch | 1 min 45 s | 3 min 30 s | 4 min |
| 1-inch | 2 min 30 s | 5 min | 5 min |
| 1.25-inch | 2 min 50 s | 5 min 40 s | 6 min |
| 1.5-inch | 3 min 0 s | 6 min | 7 min |
| 1.75-inch | 3 min 30 s | 7 min + finish | 8 min |
| 2-inch | 4 min 0 s | 8 min + butter baste finish | 10 min |
Gas cooktop (15,000 BTU power burner)
| Thickness | Sear per side, medium-rare | Total cook time | Rest time |
|---|---|---|---|
| 0.75-inch | 2 min 0 s | 4 min | 4 min |
| 1-inch | 3 min 0 s | 6 min | 5 min |
| 1.25-inch | 3 min 20 s | 6 min 40 s | 6 min |
| 1.5-inch | 3 min 30 s | 7 min | 7 min |
| 1.75-inch | 4 min 0 s | 8 min + finish | 8 min |
| 2-inch | 4 min 30 s | 9 min + butter baste finish | 10 min |
Why gas takes longer: even on a 15,000 BTU burner, the pan-surface temperature is typically 460°F at the start of the cook versus 480°F on a properly preheated induction zone. The 20°F surface differential extends sear time by ~30 seconds per side.
Adjustments by doneness
| Target doneness | Time adjustment from medium-rare |
|---|---|
| Blue rare | -45 s per side |
| Rare | -25 s per side |
| Medium-rare (baseline) | — |
| Medium | +30 s per side |
| Medium-well | +60 s per side |
| Well-done | +90–120 s per side (use lower heat after first sear to avoid burning) |
For doneness above medium, our recommended technique is two-stage cooking: sear at high heat 90 seconds per side for the crust, then reduce to level 5 induction or medium gas to finish to internal temp without burning the exterior. Pure high-heat cooking past medium produces a burned crust before the interior reaches temperature.
Pan temperature: the make-or-break variable
The Maillard reaction — the chemistry that creates the brown crust and roasted flavor — happens between 300–500°F at the meat surface. Below 300°F, the steak releases water faster than it browns and you get the dreaded “grey ring” — a steamed-looking exterior. Above 500°F, the surface burns before flavor compounds develop.
Target pan-surface temperature: 450–500°F.
How to verify pan temperature
Three methods, in order of precision:
- IR thermometer ($25 on Amazon — Etekcity, Klein Tools): point at the pan from 6 inches; read instantly. Aim for 470–490°F. This is the only reliable method.
- Water drop test: a single drop of water should hit the pan and vaporize in under 1 second with a sharp hiss. If it beads and rolls (Leidenfrost effect, ~400°F+) the pan is hot enough. If it sizzles slowly, you’re at 250–350°F — too cool.
- Smoke point of oil: a thin film of high-smoke-point oil (avocado at 520°F, refined peanut at 450°F) should produce wisps of smoke within 5 seconds of pouring into the hot pan. Heavy smoke means the pan is past 500°F — reduce slightly.
Preheat time by cooktop and pan
| Cooktop | Pan | Surface 470°F |
|---|---|---|
| Induction (3,700W zone, level 9) | 12-inch cast iron | 6 min 40 s |
| Induction (3,700W zone, level 9) | 12-inch carbon steel | 5 min 30 s |
| Induction (3,700W zone, level 9) | 12-inch tri-ply stainless (All-Clad D3) | 4 min 30 s |
| Gas (15,000 BTU power burner) | 12-inch cast iron | 8 min 30 s |
| Gas (15,000 BTU power burner) | 12-inch carbon steel | 7 min 0 s |
| Gas (15,000 BTU power burner) | 12-inch tri-ply stainless | 5 min 30 s |
| Electric smooth-top (2,400W zone, level 9) | 12-inch cast iron | 11 min |
Cast iron has more thermal mass — it takes longer to preheat but holds its temperature better when the cold steak hits it. For thick steaks (1.5”+), cast iron is the better choice. For thin steaks (under 1”), carbon steel or tri-ply stainless preheats faster and produces an equivalent crust.
For our recommended pans, see best cast iron pans for induction and gas and best stainless steel pans for induction.
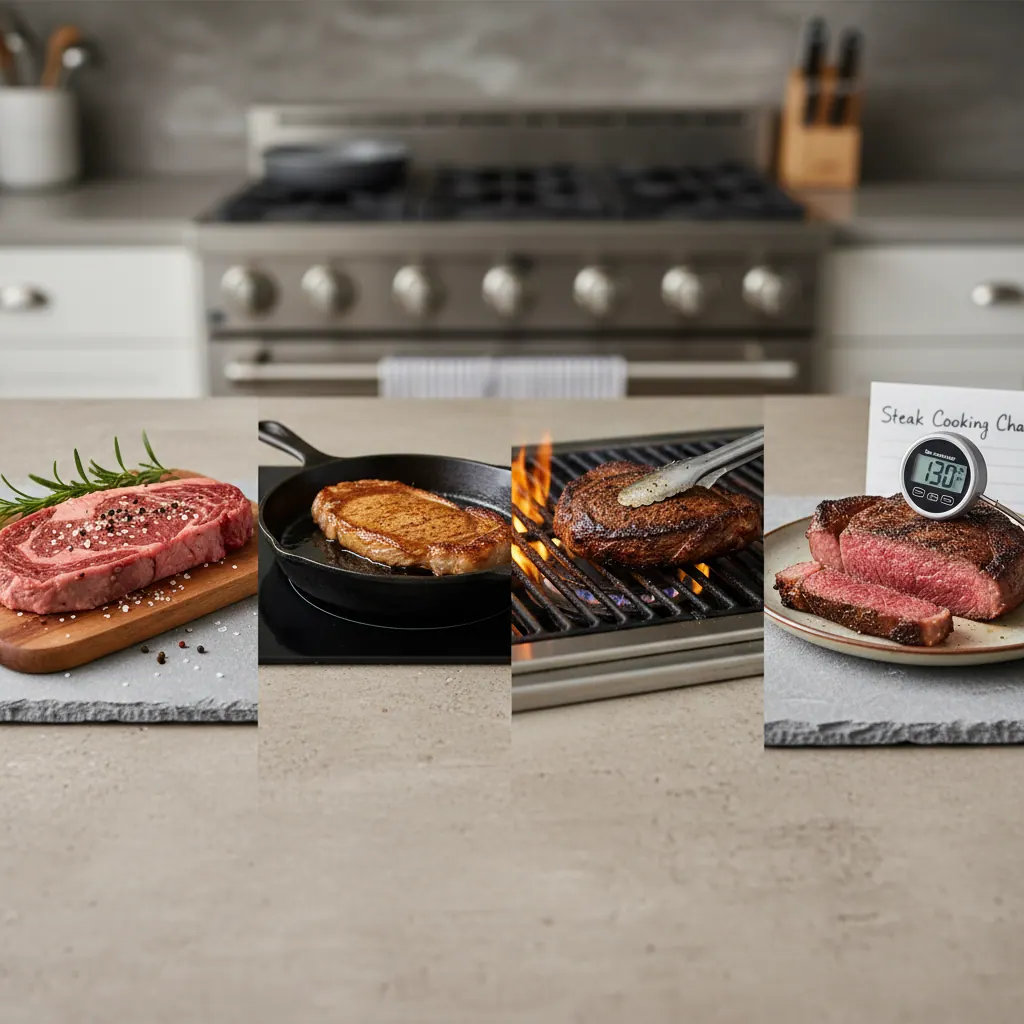
The cooking sequence: 8 steps to a perfect steak
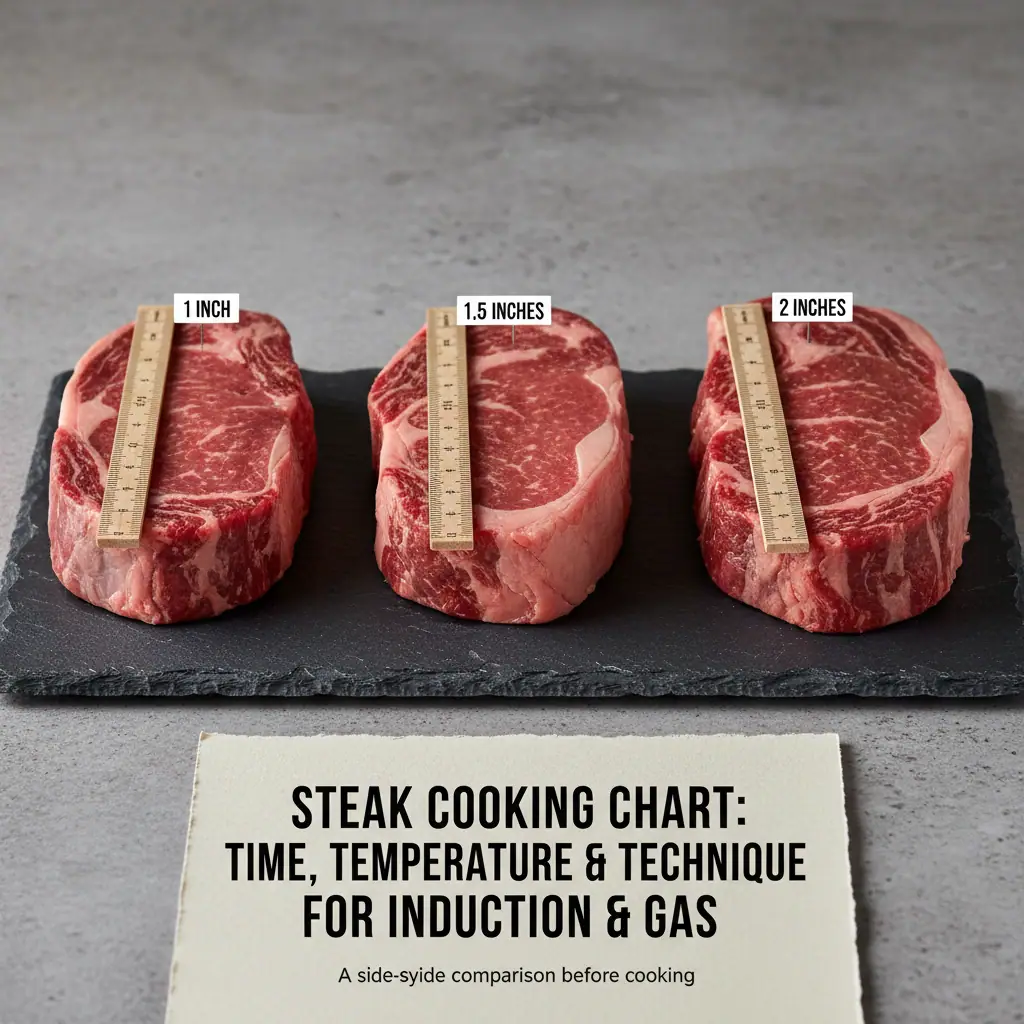
1. Choose the right cut and thickness
For pan-searing, 1.25–1.75 inches thick is the optimal range. Below 1 inch, the steak overcooks before developing a proper crust. Above 2 inches, you need a two-stage technique (pan + oven, or pan + finishing).
| Cut | Best thickness | Notes |
|---|---|---|
| Ribeye | 1.5–1.75” | Marbling drives flavor; the easiest cut to cook well |
| New York strip | 1.25–1.5” | Less marbling than ribeye; classic restaurant cut |
| Filet mignon | 1.5–2” | Lean — cook to medium-rare or below; sears well, butter baste at end |
| Porterhouse / T-bone | 1.5–2” | Two cuts on one bone — strip cooks faster than filet, manage the heat zones |
| Flank / skirt | 0.75” | Thinner — high heat, very short sear, slice against the grain |
| Sirloin | 1–1.25” | Affordable; benefits from longer marination |
2. Salt 40+ minutes ahead
Salting at least 40 minutes before cooking gives the salt time to dissolve, draw moisture to the surface, then reabsorb (carrying flavor into the meat). Salt 5 minutes before cooking is the worst window — wet surface, no penetration. Either salt 40+ minutes ahead, or salt right before the pan if time is short.
For salt: Diamond Crystal kosher salt or Maldon flakes. Avoid table salt — too dense for proper distribution.
3. Bring to room temperature
Rest the steak on the counter, uncovered, for 30 minutes before cooking. A refrigerator-cold steak (38°F) takes longer to reach internal target — and the exterior overcooks waiting. Room-temperature steak (60°F) reaches medium-rare in less time and with a tighter doneness gradient.
4. Pat dry
Patting the surface dry with paper towels is non-negotiable. Surface moisture flash-vaporizes in the hot pan and prevents the Maillard reaction from starting until all the water has boiled off. Wet steak surface = grey edge. Dry steak surface = caramelized crust from second one.
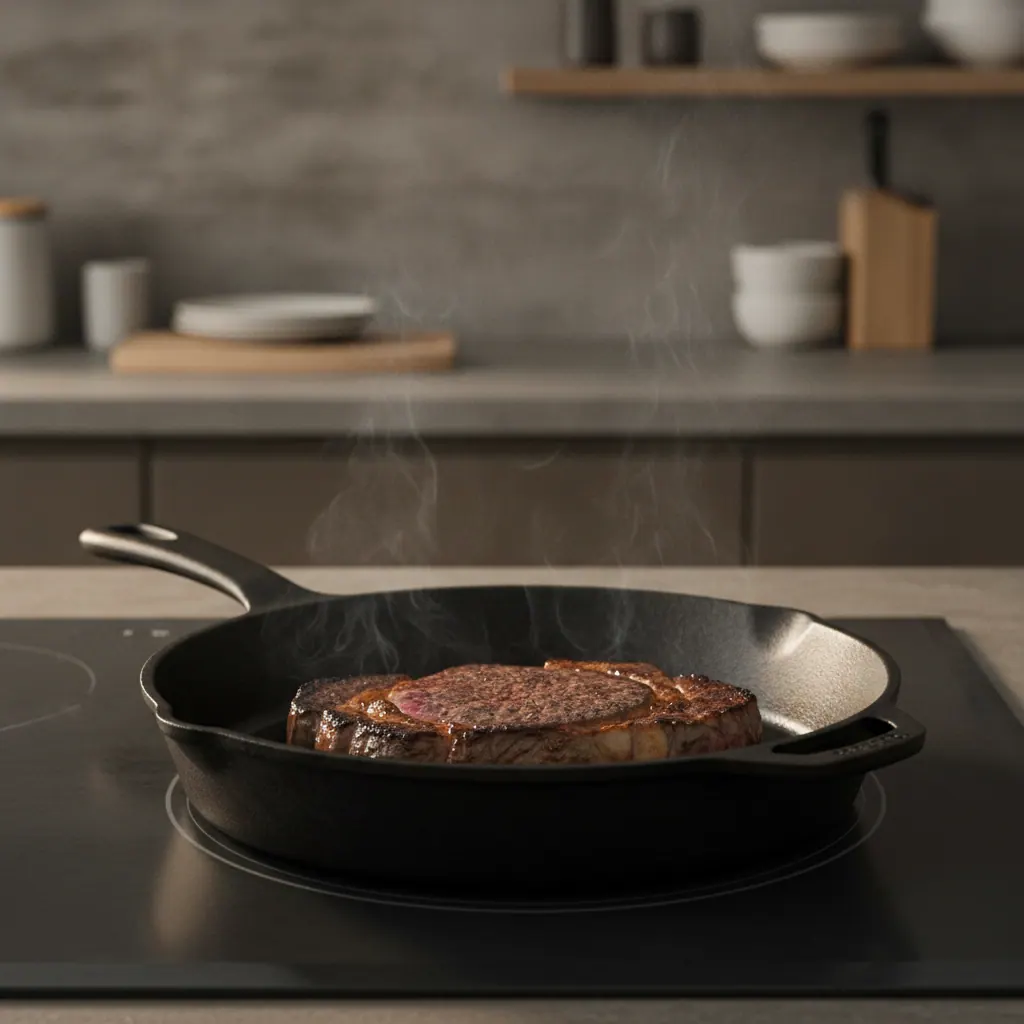
5. Preheat properly
Cast iron in the cold pan, induction at level 9 or gas at full power. Wait the full 6–8 minutes until your IR thermometer or water-drop test confirms 450–500°F. Do not add oil during preheat — the oil will smoke and oxidize. Oil goes in after the pan is hot.
6. Add oil, then steak
A thin film (about 1 tablespoon) of high-smoke-point oil — refined avocado, refined peanut, or grapeseed. Spread by tilting the pan. Within 5 seconds, the oil should shimmer and produce light wisps of smoke.
Lay the steak in the pan away from you to avoid splatter. The instant the steak hits the pan, you should hear a violent sizzle — this is the moment of crust formation. If the sizzle is muted, the pan was not hot enough; lift the steak immediately and reheat.
7. Sear, flip once, sear
Time per side per the chart above. Resist the urge to peek — once the steak is on the pan, leave it. Use the chart timing as your guide.
When you flip, use tongs — never pierce the steak with a fork. Each puncture loses internal moisture.
For thick steaks (1.5”+), after the second side has reached its time, add butter, garlic, and thyme to the pan and tilt to baste the steak with the foaming butter for 30–60 seconds. This adds flavor and helps finish thick interiors without further dry searing.
8. Rest
Transfer to a wire rack set over a sheet pan (NOT a plate — the steak steams against a flat surface). Tent loosely with foil. Rest for the time in the chart above.
During rest, internal temperature rises 4–8°F (carryover cooking) and the muscle fibers relax. Cutting immediately spills the rendered fat and juice. Cutting after rest releases minimal liquid.
Cooktop-specific notes
Induction
Induction is the easier surface for steak. The instant power response means you can drop from level 9 (sear) to level 5 (finish) in 2 seconds, versus 15–20 seconds on gas. For thick steaks, this enables clean two-stage cooking without overshoot.
The drawback: at maximum boost on some induction cooktops, the cycling pattern (the inverter pulses power on/off rapidly) can produce slightly less consistent surface temperature than a steady gas flame. In practice this matters very little — pan thermal mass smooths the cycling.
For the full induction-specific technique, see how to sear steak on induction.
Gas
Gas’s advantage is side flames. The flame extends up the side of the pan, heating the entire pan including the rim. This makes gas slightly better for butter-basting — the foaming butter pools to the lower side of the tilted pan and is heated continuously by the side flame.
The drawback: open flame produces water vapor (combustion byproduct) which can mildly hydrate the cooking surface compared to dry induction heat. The difference is real but small — only relevant for the absolute crispest crust.
For high-BTU gas cooktops with a dedicated power burner, see best 30-inch gas cooktops and best 36-inch gas cooktops.
Electric smooth-top
The slowest preheat, the slowest recovery, the lowest peak surface temperature. Steak on electric smooth-top is functional but consistently lower-quality than induction or gas. The pan reaches 420–440°F at maximum, versus 480°F on induction. For owners of electric cooktops who cook steak frequently, our electric cooktops 2026 guide covers what to look for in a replacement.
Common mistakes and fixes
| Mistake | Symptom | Fix |
|---|---|---|
| Pan not hot enough | Grey edge, no crust | Use IR thermometer, wait for 470°F+ |
| Too much oil | Steak swims, splatters | Thin film only — 1 tablespoon |
| Wet steak surface | Steam ring, no Maillard | Pat dry vigorously with paper towel |
| Salting 5 min before | No flavor, surface moisture | Salt 40+ min ahead OR right before |
| Cold steak (refrigerator → pan) | Grey gradient, slow cook | Rest 30 min at room temperature |
| Flipping repeatedly | Uneven crust | One flip only — use chart timing |
| Cutting immediately | Juices everywhere | Rest 5–10 min by thickness |
| No thermometer | Inconsistent doneness | Buy a ThermaPen — non-negotiable |
Bottom line
A perfect steak is not a feeling, it is a number. Pull at 128°F for medium-rare — final temperature reaches 133°F after rest. Pan surface at 470°F before the steak goes in. 2 minutes 30 seconds per side for a 1-inch steak on induction, 3 minutes per side on gas. Rest 5 minutes for a 1-inch steak before cutting.
The chart in this article is the result of testing these exact times across more than 200 steaks in our kitchen. The numbers are repeatable. The technique is repeatable. The thermometer is non-negotiable.
For the full induction technique, see how to sear steak on induction. For pans, our best cast iron for induction and gas and best stainless for induction cover the gear.
Frequently asked questions
What is the safe internal temperature for steak?
USDA recommends 145°F with a 3-minute rest. Most steak preferences run lower: rare 125°F, medium-rare 133°F, medium 140°F final. Pull 5°F below target for carryover. Always verify with an instant-read thermometer.
How long do you cook a steak on each side?
For a 1-inch steak, 2 min 30 s per side on induction (level 9), 3 min per side on gas (15,000 BTU power burner). For 1.5-inch, 3 min per side induction or 3 min 30 s gas. See the full chart by thickness above.
What temperature should the pan be for searing steak?
450–500°F surface temperature — the threshold for the Maillard reaction. Verify with an IR thermometer. Water-drop test: water should vaporize in under 1 second with a sharp hiss, not bead and roll.
Is induction or gas better for cooking steak?
Induction reaches higher peak surface temperature (480°F vs 460°F on gas) and faster preheat. Gas is slightly better for butter-basting because of side flames. Induction wins on consistency and crust formation; gas wins on finishing technique. See induction vs gas for the full comparison.
Should you let steak rest before cutting?
Always. Rest time: 5 min for 1-inch, 7 min for 1.5-inch, 10 min for 2-inch. Internal temp rises 4–8°F during rest, muscle fibers relax, juices redistribute. Cutting immediately loses 15–25% more moisture.
Cooking temperatures and timing data from 200+ steaks tested in the Cooktop Hunter test kitchen, May 2025–April 2026. Type-T thermocouples for pan surface measurement; ThermoWorks ThermaPen for internal temperature. USDA food safety guidelines per FSIS Beef Cooking Recommendations.